Posting My Wildtree Events, Products, Recipes and Healthy Simple solutions to help you make great meals for your family.

Friday, December 31, 2010

Simple Basic Baking Knowledge

 I have decided to  put on my apron and to get "Back to Simple Basic Cooking and Baking". This Blog will be for  Those  people who will be making  New Year plans and resolutions to either cook more healthy or more often at home. Does this sound familiar to you? Eating Healthy and wanting to grow & eat good fresh and organic food is my  number one goal for 2011.
In my Home My kitchen is the center of my life. It appears  you also spend plenty of time there either eating or cooking. "From my Kitchen Table to Yours" is where I will share recipes and cooking tips. I hope to give you information you may not know and to share some of the things I have learned & gleaned from other cooks and even a few famous chefs.  I am starting with Baking Terminology.  Some you may already be familiar with others maybe not... "Now we are cookin"
A Glossary of Baking Terms.


Bain Marie is a water bath.  The baking pan or dish is placed in another containing hot water, resulting in a very gentle cooking.
Bake Blind- The term given to the process of par-baking pastry shells.
Baking Beans- Used to weight pie dough down while baking blind. Baking Beans can be purpose-made ceramic or metal beans, or dried beans or rice. All can be used.
Beat- Method of incorporating air into ingredients, or combining or softening an ingredient with a fork, spoon or whisk.
Creaming- The process of beating sugar and fat together until the mixture is creamy in both color and texture.
Dough- A mixture of flour and liquids dough can be described as either soft or firm, depending on its stiffness.
Dredge- Sprinkle generously
Dust- Sprinkle lightly
Fermentation-A term to describe the chemical action produced by yeast as it converts sugars in the flour to carbon dioxide and alcohol (which evaporates during baking)
Folding In-the term used to describe carefully incorporating flour into mixture using a cutting and folding-over movement.
Glaze - a thin shiny coating  that may be of egg, egg white, milk, water or jelly.
Gluten- Protein in flour that can be developed by kneading in the form of a dough which makes the dough elastic.
Kneading- Working together of a dough with the hands. For pastry, scones, and cookies light kneading is required. For Bread heavy prolonged kneading is required to develop gluten.
Knock Back- To knead dough for a second time after the first rising. This helps to ensure an even texture.
Piping- The process of pushing a mixture through a bag fitted with a piping tip to shape. Some cookies and choux pastry can be shaped. Piping is also used to shape frosting to decorate cookies and cakes.
Prove- To let bread rise a second time after knocking back and shaping it.
Rub In- Rub fat into flour with the fingertips until evenly distributed.
Sift To shake dry ingredients through a sifter. Sifting flour helps to incorporate air.
Syrup- A concentrated solution of sugar water.
Unleavened a term for bread that do not  use a raising agent.
Whip- The same as whisk, but is usually used in relation to cream and creamy mixtures.
Whisk To beat ingredients rapidly to incorporate air into them.

Friday, December 10, 2010

Yes, I cheated...


I cheated I admit it.. I was under the gun and needed a quick cookie for an exchange. They were easy to do and to eliminate the last minute stress ( which nobody needs during the holidays) I found Betty Crocker limited edition Gingerbread Cookie Mix is a real time saver. Only three ingredients are added to the mix -- butter or margarine, water and an egg.  They taste good ... not as good as homemade good but I would give them a whirl again. I made some into snaps and mixed up an easy powdered sugar icing..added  with a hint of lemon extract. These would be great for a bake sale item anytime..  You can find the cookie mix in any supermarket.  Be sure the package says "Gingerbread Cookie mix".
 Do you see those  Creamy Caramels? Those are fun to make too and  were a special request from my daughter and sister for Christmas.  Since I was in the mood I made a batch...It was fun to wrap them in recycled butter wrappers for a cute country presentation. The recipe is from Mary Janes Farm Girl Magazine Dec-Jan 2009 page 107.  I'd be happy to email the recipe if requested...  Now I must get started on a few Christmas cards and cross that of my growing holiday list.. Be Happy and Enjoy your time in your Kitchen..Stress free.....I hope.
Posted by Picasa

Friday, December 3, 2010

Oh My! Gooey Sticky Buns Hon!


Let the Holiday baking Begin...
 Today I made two loaves of bread and these yummy Sticky Buns. I altered the recipe from the Oprah's Magazine Cookbook. ( I made a basic yeast bread dough and cinnamon rolls from another recipe I have had for years..) The Sticky part I followed.
from her book.


Sticky Bun Goo..
1 /1/2 sticks butter softened
1 1/2 cup brown sugar
1 Tblsp ground cinnamon
3/4 cup chopped pecans.
Mixing all ingredients except the pecans together, spread in a round baking dish. sprinkled the pecans over that gooey mixture and placed the dough rolls on top. Baked in a 325 preheated oven for 25 minutes  or until nice & brown. Remove and t if you like.
Frosting
4 ounces cream cheese softened 1 1/2 cup powdered sugar
1 tsp vanilla extract.
So now tell me Don't these look yummy?   Looks  like somebody  is sneaking one already....I just  had to make them.. to get in the mood....The bread turned out pretty darn good too... don't you think? I wish  you could smell the aromas in my kitchen right now. mmmmmm!


Posted by Picasa

Wednesday, December 1, 2010

Where's the Hen who cooks here?

I have been out of my kitchen for awhile. Well, not really out..I  just have not cooked up any special foods to share. With the holidays coming I am sure the aromas will start filling the house again.. Please stop by The Blue Sky Farm Blog to see what's new and I will get back to cookin soon...

Sunday, November 21, 2010

Quick Bread with Olives

I was thinking since its cold and wintry outside, my kitchen needed to smell warm & cozy inside so of course the first thing that popped into my  mind was some baked bread for dinner tonight . I am fixing chicken & rice casserole and what could be better than a quick bread... This is an olive loaf topped with a sprinkle of grated cheese. Does certain food just sound good on a cold winter day to you?

 The recipe is a Basic quick Bread dough. I added four different flavors of olives, Green with pimento, green with stuffed almonds, Green with stuffed jalapeno peppers& garlic and plain black olives.Then I added some thyme leaves and some cumin and about 1/2 tsp of capers. I didn't measure, Just eyeballed it.. The olives were salty so no need to add salt, but if you do use it sparingly. I used a mixture of cheese, Monterrey Jack & Medium Cheddar. Baked about 50 minutes in a 350 oven and that's it... Spread a bit of butter and had my husband try it.. He thinks the texture is similar to cornbread.. I can live with that.. and I think serving slices warm or cold will do fine.  Do you have a favorite savory bread to serve with   soups & casseroles? I'd love to try one of yours...

Friday, November 12, 2010

Split Pea Soup Time

 Its soup time... Today it was Split Pea soup, one of my favorites.
Easy to make and ever so good.
I usually start with a ham hock, but I only had panchetta in my freezer so that does me fine.     I fried it a bit and added it to the pieces of ham that I had cubed. Set aside. Poured about 1  1/2 cups of dry green peas into enough water to cover them. Added a sprinkling of salt ( not too much if  not sure of how salty the ham& panchetta are ) add a bit of pepper & celery seed, you can add more salt more later if necessary.   I also usually use a few chopped up carrots but today  used parsnips..And about 3/4 cup chopped onion.  


 Cook those together until peas are tender.. add the ham & panchetta bits and continue cooking until soup thickens about 20 minutes on medium heat.  Now doesn't that look good?  How about adding some crusty sour dough bread...


This makes a nice quick supper and leftovers are yummy too..
Bon appetite!

Monday, November 8, 2010

My Mama's Pressure Cooked Beef Stew


 Is that Dinner I smell cooking? If you are at my house right now it sure is.. and  It is My Mama's Pressure Cooked Beef Stew.  I have many memories of my childhood and one of them includes the dinner table.. and I never missed a meal.. did I say "I love to eat"?
One of my favorite dinners was Mama's Stew. We were not a wealthy family but we didn't know that..growing up I don't remember ever going "out  for dinner". Dinner was always at home. We all sat around the chrome kitchen table with Mom & Dad. ( Holidays were different, that was Family Relative times and we had many dinners with them. ) that's Another story..... 
With 3 sisters, we had our share of hand me downs when it came to our clothes. Being the oldest of course I felt lucky  to be first in line..and that also went for coming to the dinner table. My mama made the best soups. ie: Potato, Split Pea and Beef Stew. I was always a bit timid about cooking with my pressure cooker, ( mama warned us many times about staying away from the stove when she was cooking.) I quickly learned how to manage the cooker when I had my own family to cook for.. I always thought it might blow up but  I never had that happen. Just remember to follow your manufactures instructions when releasing the lid and follow the cooking time. My cooker is really easy to use. It's a"Kitchen Pro"and   I have had it for years. So here today, is a cold Pre-snow day and beef stew sure sounded good. ( I hope there are left overs)


Here is her recipe:


My Mama’s Pressure Cooker Beef Stew


Basic Ingredients
1 tablespoon vegetable oil 
1 small onion, diced 
2 T minced garlic
2 pounds cubed beef stew meat 
5 carrots, peeled and diced 
5 medium  potatoes, peeled and cubed 
4 ribs of cubed celery
2 cups vegetable stock or water 
Salt & pepper to taste
Directions
Heat the oil in the bottom of the pressure cooker over medium-high heat. If your cooker has an insert, remove it and cook directly in the bottom of the pot. Add the onion, garlic and beef, and cook until browned on the outside. 
Stir in the stock or water, close the lid, and secure the pressure regulator. Heat until you start to hear sizzling, then reduce the heat to medium, and set your timer for 20 minutes. If you have an adjustable pressure regulator, set it for 10 pounds of pressure. 
Meanwhile, place the potatoes carrots, celery in a saucepan with enough water to cover. Season to taste. Bring to a slow boil, and cook until tender, about 10 minutes.   This whole process should take about the same amount of time as the rest of the stew. 
When the 20 minutes are up, release the pressure from the pot according to the manufacturer's instructions - mine needs to sit under cold running water for 5 minutes until the lid can be released. 
Remove the lid, and place the pot over medium heat. Add the  potatoes, carrots, celery to the stew meat, cook until vegetables are tender. Stir the cornstarch into a small amount of cold water to make a thickened gravy. Stir this into the stew, and cook for a few minute. Serve hot with biscuits or dumplings. Yummmy!

Saturday, November 6, 2010

Found my way back...

I am ready to get back into the kitchen..boy it's been awhile hasn't it?  I have been away way too long. First I had to re-organize my space. Being away so much  things seem to get put away in the wrong places.( My husband is a great cook, but he doesn't put things where I do.) Do you have this problem?
Next, I must defrost the freezer a bit, at least scape down the accumulation of frost. * I guess the door must have been left ajar a few hours.

Now, I think Stuffed Peppers sound good for our dinner tonight.  Hamburger and tomato sauce thawing for the stuffing and found some nice wild rice in the pantry. I will post the recipe and pictures later.  The weather is changing and I think a hot meal is in order.* Any leftovers will be appreciated tomorrow for lunch. Do you like leftovers? Sometimes I do....and I have noticed somethings just don't get eaten, they get forgotten and pushed to the back of the refrigerator... You know how that goes.


Friday, October 15, 2010

Peach Delight


I have been out of the kitchen way too long and I have a few peaches thawed so thought I'd throw together a quick dessert. My sister served it one evening and it was very nice. I hope you enjoy it as much as I do.


Sicilian Peach Delight
Serves 4


1 large egg
2/3  cups sugar
½ cup flour + more for dusting
¼  tsp vanilla
1/8 tsp salt
¼ cup milk
1Tblsp unsalted butter
1 ½ cups ripe peaches peeled & sliced


In med. Bowl beat the egg w/1/3 cup of sugar. Slowly add the ½ cup flour, stirring continuously. Once blended stir in vanilla & salt. Pour in Milk and beat w/ fork until the consistency of crepe batter.
Butter an 8x10 baking dish & flour slightly. Layer peaches in pan cover w/ batter. Bake 375 or until top is golden brown about 30 mins. Sprinkle top w/ remaining 1/3 cup sugar .  Serve out of pan.


Sunday, October 3, 2010

Blueberry Popovers

This recipe was given to me by my mother-in law when I lived in England. They are very easy to make and I think you might want to add any other fruit of your choice.


Easy Popovers

1 ½ cups all purpose flour
¾ teaspoon alt
3 large eggs
1 ½ cups milk
4 Tablespoons butter


In large bowl mix flour & salt.  Make a well in the center.
In another bowl beat eggs & milk together.
Gradually pour milk & egg mixture into the well of flour.
Mix until slightly lumpy do not over mix.


Set aside for 30 minutes at least to 1 hour.  Preheat oven to 425
 Put 1 tsp of butter in each muffin cup. Melt in hot oven about 1 minute . Remove from oven & pour evenly the batter into the cups. Bake until popovers are puffed and golden brown. ( about 20 minutes) Turn out popovers and serve warm.
(I add blueberries, stir into batter before placing in the cups) just before baking.. Just sprinkle a few into the mixture.
Bon appetite!


Saturday, October 2, 2010

Pulled Pork Sandwich kind of day

 Today is Saturday, a quiet, slow moving day, means a  Slow cooker... And a Pulled Pork Sandwich Dinner.
I got a late start on this  but had plenty of time before dinner at 7:00
Does that sound  like a good dinner to you?


I started it at 1PM and managed to take a nice nap at 3:00... I used a nice pork  butt shoulder roast I had in the freezer. Thawed it out and popped it well seasoned into the crock pot for 6 hours. It was perfect accompanied with a cold imported Mexican  Beer & dill pickle. Oh yes, I am full and have left overs for another....maybe tomorrow lunch?


Perfect Pulled Pork * Cooking Club
5 lbs boneless pork butt shoulder
1  ½ tsp smoked paprika
2 tsp. Black pepper
1 tsp cayenne pepper
1 tsp dried thyme
1 tsp garlic powder  or fresh crushed or  minced  gaarlic
½ tsp salt
1 cup  water

Combine all seasonings in bowl, rub over roast. Place roast in a 6 qt slow cooker with water.
Cover cook on low 6-8 hours or high for 4-5 or until pork is very tender.
Place cooked pork on large cutting board and let rest 10-15 minutes. Pull, slice or chop to serve. Serve in a buns with your favorite  BBQ  sauce.

Thursday, September 30, 2010

Look Sharp! Knife Knowledge

 My husband usually sharpens my knives for me and does a great job. I have made a few mistakes and have actually cut myself. Everyone does this from time to time...I have learned a few pointers and wanted to share them with you....in case you didn't know.

Did you know a sharp Knife  is actually safer than a dull one. Dull knives are more likely to slip off foods, resulting in cut fingers. The preferred equipment for sharpening knives is a whetstone. which takes some practice to master. A grinding wheel or electric knife sharpener  can restore and a sharpening steel keeps the edges in alignment. If you have a problem keeping an edge on your knife it may mean that you are not using the steel as frequently as you should. You may have to use a grinding tool, such as a wheel or an electric sharpener to restore the edge. Once your knife is sharp, run both sides of your knife along the sharpening steel at a 20 degree angle before each and every use: wipe off the blade on a clean towel to remove any metal fragments.
 The two best places to store your knives are a magnetic rack or in a wooden counter top knife block. Never store them in a drawer with other utensils. Not only do you risk injury, but knife blades may become nicked and dented beyond repair.
The four basic knives to own are a chef knife (also called a French knife) for chopping and julienning, a paring knife, a slicing knife  and a boning knife. Additional knives you may want  include a serrated knife for slicing bread, a cleaver, a fish filleting knife and a pair of kitchen shears.
So know you know.... Be careful, pay attention when you are cutting and keep your knives sharp.

Tuesday, September 28, 2010

From My Table to Yours

Last Tuesday  my Kitchen Table was full of "other stuff" No time for Sharing, I apologize.. But today my Kitchen is painted and everything is put back..I love the new look..


When My sister was here I purchased a new cookbook.. Yes  Another one.. This one is a cake cookbook. I love cake, now I can  as the saying goes "bake it and eat it too.. " or something like that...
It's called Cake Keeper Cakes. by Lauren Chattman.

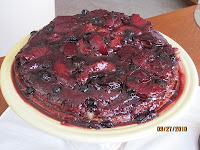
Yesterday I had a few plums left over from the jam making session and found the perfect cake to bake. "Plum-Blueberry Upside Down Cake"
Fitting since my kitchen was turned upside down while doing the paint project!

The recipe was a bit lengthy but came together nicely.
The cake batter made with sour cream is a rich and delicious base for the plums and blueberries. This is a particularly beautiful cake, bright purple with blasts of Blue.. Don't you think? It is a very sweet,light &  moist cake that practically melts in your mouth. Martha Stewart has a similar cake  recipe posted on line from her Everyday Food magazine.


I do wish you were here to sample a piece. I like making one layer cakes ( this way when I want a second piece, I don't feel guilty, It's like having a single slice of a two layer cake.) Silly thought there..right? .  You can purchase this book of 100 simple cakes at a bookstore I am sure or  I got mine in a small Kitchen Shop here in town... Next time I will share some other tasty treat from my kitchen table to yours.... Be sure to come back for more....Please leave me a comment.. I love to hear who was visiting and Company is always welcome!

Saturday, September 25, 2010

Recipe for Peach and Pepper Jam

I have received many requests for this recipe. It is from CDKitchen

Peach And Pepper Jam

Ingredients:
4 cups peeled peaches...finely chopped
1 whole red pepper...chopped
1/2 cup green pepper...chopped
1/2 teaspoon grated lemon peel
2Tablespoons cider vinegar
1/4 teaspoon hot pepper sauce ( I used a small finely chopped jalapino pepper instead)
1 box fruit pectin crystals
5 cups of sugar

Directions:
Place peaches in a large saucepan. Combine peppers, lemon rind, cider vinegar, hot pepper sauce ( or chopped  jalapino) and fruit pectin ith the fruit in saucepan. Place saucepan over high heat and stir until mixture comes to a full boil. Stir in sugar bring to a rolling boil stirring constantly. remove from the heat. Skim off foam with a metal spoon. Pour quickly into warm sterilized jars filling to 1/4 inch from the rim. Seal with hot steriized lids.

*I found if you follow this recipe as it is.. the jam may not set firmly which is fine for a sauce to pour over baked  chicken  and roasted pork. If you let boil for 4 minutes it will set as jam. Great  poured over a brick of cream cheese and served as a dip with crackers  Either way a nice holiay gift idea.
Enjoy.

Thursday, September 23, 2010

Fruits of my weekly labors


From Peaches add Peppers.. and you get Peach Pepper Sauce. Great poured over baked chicken, or roasted pork and tasty over a plate of cream cheese and used as a dip.
Here we have plums turned into jam.  AND  tomorrow my Tomato Salsa and Peach Raspberry Jam.

Tuesday, September 14, 2010

From MY Kitchen Table to Yours

Okay! Now what are you going to do with those green beans... I Love a Dilly Beans!


They are just a simple pickle. Great to serve in a Bloody Mary, or as a "along side" to compliment any meal.


You can freeze those beans, can those beans, dry those beans, & steam those beans and just eat those beans in a salad.
Fresh beans blanched dressed while still warm with olive oil, (or butter) lemon juice, and salt & pepper.
You can garnish with sliced raw mushrooms, with red onion, ripe tomato wedges, julienned blanched carrots. Sprinkle them with Italian dressing, herbs or any vinaigrette sauce. Yummy!


Pickled Dilly Beans (*Ball Blue Book)
Yields about 4 pints


2 Lbs green beans
1/4 cup canning salt
2 1/2 cups vinegar
2 1/2 cups water
1 teaspoon cayenne pepper (divided)
4 cloves of garlic
4 heads of dill


Wash & trim the ends off the beans. Combine salt, vinegar,& water into a large sauce pan. Bring to boil. Pack the beans lenghtwise into hot steralied jars leaving 1/4 -in headspace. Add 1/4 teaspoon cayenne pepper, 2 cloves garlic, 2 heads of dill to each pint jar. Ladel hot liquid over the beans, leaving 1/4-in headspace. Remove any air bubbles. Adjust the two piece caps. Process 10 minutes in a boiling-water canner.


There are many variations of this recipe for you to try on the internet. This has been a favorite gift to give during the holiday to your hostess.


So now you know... Lets start cookin!

Monday, September 13, 2010

Lemonade Cookies

The best lemon cookie I have eaten or made for that matter. If you love lemon you will love these.
 I got the recipe from "Cooking from the Hip"by Cat Cora.. They are so Light & Tangy. (almost melt in your mouth Good!)


I posted these on the Blue Sky Farm blog  without the recipe..so I think it is best shown here.
Lemonade Cookies
Preheat oven 375 makes
4 dozen cookies

1- 6 oz can frozen lemonade
1/2 lb unsalted  butter (2 sticks)   softened
1 cup sugar plus extra to sprinkle over cookies
2 teaspoons finely grated  lemon zest ( optional)
2 large eggs
1/2 cups all purpose flour
1 teaspoon baking soda
1/8 teaspoon salt
Fill a large bowl with warm water  and plop in the frozen can of lemonade to thaw while you mix the cookie dough
In a large bowl cream together the butter and sugar.
Add the lemon est, If desired . ( I used it)
Add the eggs one at a time , beating well after each addition. Continue beating unbtil the mixture is light & creamy. 4-5 minutes then set aside.
 In seperate bowl , wisk together the flour, baking soda & salt.
measure out 1/2 cup of the thawed lemonade concentrate and set the rest aside.
 Add about 1/3  of the flour mixture  to the creamed butter & stir and add about 1/3 of the 1/2 cup lemonade.  Continue adding the flour  and lemonade  alternately, stirring after each addition. Mix until no streaks of flour show. Beat on low speed just until all ingredients are combined.
Drop by rounded teaspoonfuls of the dough 2 inches apart onto an ungreased baking sheet.
Bake the cookies, checking after 6-8minutes.   When the  edges are just starting to brown remove them from the oven. (the centers will still look soft.) using a pastry brush immediately brush  the tops  of each cookie with  a little reserved lemonade then sprinkle lightly with sugar. Transfer to a rack and let them cool completely.
Bon Appetite!

Friday, September 10, 2010

Autumn brings Flowers, candles & baking

It is Autumn.  I have started a bit of baking and out come the candles and fall flowers.
I love the scent of burning candles in my kitchen from early morning when I am drinking my coffee to late evening.
Today,  I have Vanilla and Pumpkin Spice burning . Boy! does it smell heavenly when you walk in the door. Such a welcoming  feeling to see them burning too.
 I baked a low-fat  bread pudding yesterday and put it in the freeer, We have guests coming next week and I wanted to get a jump on dessert. As you all know I love to cook for company. My company this time is family. My sister & her husband & Karen loves to cook too.She makes the best apple pie.....her crusts are to perfect! She is always nominated to bring the pies for family get togethers... and we thoroughly enjoy sitting in the kitchen discussing cookbooks & recipes  and laughing over silly things. Of course we have a bottles  good wine to compliment the moments. So go ahead light those candles and enjoy the Autumn all day long.....

Here is the bread pudding. I have added fresh peaches to my recipe in place of dried fruit.
 
The recipe is easy and a great use for left over crusty bread. 


 Bread Pudding


4 eggs beaten
2 1/4 cups milk
1/2 cup sugar
1 T pure vanilla extract
1/2 tsp cardaman or ground cinnamon
Mix & beat those together and set aside
In an ungreased 2 qt baking dish toss 4 cups of French Bread cubes or any crusty bread and 1/3 cup dried fruit of your choice. Pour the egg mxture over  the bread cubes.
Bake in 350 oven about 45 minutes or until a knife inserted in the pudding comes out clean. Cool. Serve warm  with your favorite sauce or whipped cream. Makes  8 servings.
Bon Appetite!

Thursday, September 9, 2010

Simply Delicious Peachy Dessert

A Gallette or a Crostata…Matters Not…   Simply A Rustic Pan- Free Delicious Dessert!


I'd liked to think that peach desserts are an American specialty, particularly a Southern one. There is the traditional peach cobbler, peach crisp, and peach crumble. There are also the peach pie and tart. But when simply baked on a pan with the edges of the dough turned over, you have what the French call a galette and the Italians a Crostata. An extra crispy rustic free form crust sets the Galette or crostata apart from pies and tarts. A great way to use any extra fruit in season.


When prepping for this recipe, it's best to start with the very best peaches. They should be firm yet ripe and only give slightly to pressure. When peaches are perfectly ripe, their skins slip off easily with little help from a knife. If having trouble, the peaches can be dipped into boiling water to remove the skin. Avoid bruised and mealy peaches, which are usually the supermarket ones that have been picked under ripe. The best places to buy peaches are at pick-your-own farms and farmers' markets. There you know that the best is available, rewarding you with juicy, ripe fruit as well as noteworthy desserts.

Preheat oven 350 degrees F.


Fresh Peach Galette/Crostata
2 pounds ripe peaches (about 4 or 5 large), peeled and cut into eighths
1 tablespoon lemon juice
1 tablespoon corn starch
1/4 cup light-brown sugar
1/4 teaspoon salt
Combine lemon juice, corn starch, sugar, and salt; pour over peaches. Toss carefully to coat. Let macerate for 10 minutes. Yummy…Nice juicy peaches.

Roll out dough on a sheet of lightly floured parchment paper to 13 inches in diameter.

Carefully lay dough with parchment paper on a baking sheet.
Pour onto the dough the sliced peach mixture. Including any juice left in the bowl. Fold up the 2-inch border of the dough, overlapping when necessary. Bake for 40 minutes until the peach juices are bubbling and the crust is golden brown. Yield: 6 servings.


Crust
2-1/2 cups all-purpose flour
2 tablespoons granulated sugar
1/4 teaspoon salt
¾ cup lard or shortening , chilled, cut into small pieces
5 Tablespoons ice water
In a large bowl, combine flour, sugar, and salt. Mix together.

Add shortening ( lard) and work with a pastry blender until mixture resembles course meal.
Add water 1 tablespoon at a time. Mix until dough comes together.
Form the dough into a flat disc and wrap in plastic. Chill for at least 1 hour before rolling.

Bon Appetite!

Tuesday, September 7, 2010

From My Kitchen Table to Yours

What are you going to do with all that Zucchini?

It is so good for us, We love to grow it, love to eat it but enough is enough right? How about those blossoms? They are edible too and pretty for garnish…

I know you have made more Zucchini bread, muffins, and cookies than you ever want and you have sautéed it, grilled it, put it in salads, eaten raw spears for snack, deep fried it, stuffed it, and given tons away to neighbors and friends…..and still have more….But have you made zucchini pickles? Coleslaw? or even used it to moisten lean meatloaf?

* Zucchini pickles are every bit as good as cucumber. Follow your favorite recipe substituting zucchini for the cucumbers.

*The crisp texture of raw zucchini makes a great base for slaw.

*Shred zucchini to make juicy low-fat meatloaf. Substitute the beef-base recipe with ground turkey. ( for every pound of meat add 2 cups of shredded zucchini) You will be adding extra veggies to your meal too.
  .......So Now  you know........"Let's Start cookin!"

Now what about all those Green beans? ( see next From My Table to Yours)

Friday, September 3, 2010

Fresh Fish Does Not Smell Fishy....


Since no fish monger lives here in Klamath Falls. I opt to get my Mahi Mahi at Costco. ( There is no Costco here either, but I make regular trips toMedford our closest one.) MahiMahi is a salt water fish. Some people say it resembles dolphin but they are not related. MahiMahi is a bluish-green skin fish. They may weigh up to 40 lbs and are considered one of the best eating fish. Ususally sold as steaks or fillets or whole.
The fish I purchase  is frozen and packaged in individual shrink wrap and I love it. When it is thawed there is never "fishy to smell" and is firm and great to bake or grill.  Fresh fish NEVER smell fishy....Even if it is frozen. If it does do not purchase it .  We try to eat fish often.  It is really good for you too. Lots of omega3 and there are many ways to cook it. I am making Mahi Mahi with a fresh Cilantro sauce for dinner tonight. It is a very simple dish and tastes heavenly.
First you thaw the mahi mahi steaks.  Fish should be thawed in the refrigerator and cooked as quickly as possible. Since there are only hubby & me we will cook only two. Fish tends to cool quickly. For this reason it should be served on warm plates or a warming platter. Yum I can't wait for dinner.
I would pair this with a Pinot Chardonnay, a French Colombard or a Gamay Rose'... Or even a Pinot Grisio since I have that bottle open and used it in the recipe..


Oven baked Mahi Mahi with Tangy Cilantro Sauce


½ cup honey
½ cup water
¼ cup rice vinegar
1/4 cup white wine
1 T corn starch
1 teas granulated garlic
½ teas grated lemon peel
2T fresh cilantro chopped
4 mahi mahi fillets

Combine all ingredients except cilantro & mahi mahi in a small saucepan
Cook and stir over med heat until mixture comes to aboil and thickens
Simmer 2 minutes add cilantro mix well Remove from heat and keep warm
Bake mahi mahi in 300 preheated oven for approx 20 minues or until fish turns opaque and flakes easily with a fork. Spoon sauce over fish ansd serve. Garnish with fresh cilantro or lemon twist.

Bon Appetite!

Thursday, September 2, 2010

What's for Dinner?

Hungry? Me too.. Lets bake some Country Style Pork..
 I have a package of country style spareribs,  about 2 1/2 lbs. that I picked up at our local butcher last week. I have thawed them & they are ready to marinate....

Always use fresh meat... It should be nice and red and firm.. Get your butcher to cut you a nice portion. Bone in or out... ( mine have bones, I think they have more flavor) pat dry the ribs and drop into a lightly oiled Hot skillet.. You will want to sear the meat to seal in all the juices. Brown nicely all sides and  season with salt & pepper and garlic cloves as much as you like I used 6 small cloves. * I also sprinkled a few flakes of chili pepper on top.... See those bits  you want those to brown with the meat.
Now remove the browned ribs from the pan and set aside . Next you will deglaze the pan...
 Pour about 3/4- 1  cup of white wine or chicken stock  into the same pan you browned the ribs & garlic in ... You can see which I prefer.. (Is that picture  blurry? Honest...I didn't even have a taste).... right into browned bits and stir to loosen those goodies from the pan bottom..leaving on stove  over med heat. Reduce heat low and  Stir in 2 Tablespoons brown sugar, 1 Tablespoon dijon mustard, and about 2 Tablespoon ketchup, 2 Tablespoons rice vinegar, 2 Tablespoons soy sauce, and 1 Tablespoon worstershire sauce..stir all together and pour over the browned ribs.. taste for  flavor balance ... more Salt? Pepper? 
I lay sliced canned pineapple and the juice over browned meat then grate fresh ginger over the ribs and cover for 30 minutes to marinade.  Then flip them over let them  sit  another 30 minutes covered. 
Then  transfer back into the original pan  you browned them in and bake in a preheated  350 oven covered for about 1 1/2 -2 hours. They will glaze nicely and turn a beautiful color of brown.. falling of those bones.. I think you will like the tangy yet sweet flavors ...You can serve these with steamed rice and a green salad and of course a chilled glass of that white wine...
Bon Appetite!